Unreal Engine 4 Plugin quick start
If you haven’t installed the SkookumScript UE4 Plugin yet, now is the time! Follow the instructions on the SkookumScript UE4 Plugin installation and setup page. For an overview of the SkookumScript Unreal Engine 4 Plugin, check out the SkookumScript Unreal Engine 4 Plugin landing page.
The  button
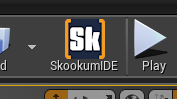
Once you have the SkookumScript plugin installed, you’ll see a new button in the UE4 editor main tool bar:
 {}
{}
Click it to launch the SkookumIDE, your main hub to using SkookumScript! If the SkookumIDE is already running, it will be brought to the foreground.
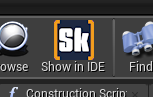
You’ll also find a similar button in the tool bar of the Blueprint editor:
 {}
{}
When you click the ![]() button in the Blueprint editor, it will bring the SkookumIDE to the foreground and also select the SkookumScript class that corresponds to the currently opened Blueprint. Furthermore, if you have a SkookumScript node selected in the event graph, the SkookumIDE will focus on the method belonging to that node.
button in the Blueprint editor, it will bring the SkookumIDE to the foreground and also select the SkookumScript class that corresponds to the currently opened Blueprint. Furthermore, if you have a SkookumScript node selected in the event graph, the SkookumIDE will focus on the method belonging to that node.
This allows you to quickly switch your workflow back and forth between UE4 and SkookumIDE.
First step: try the superpowered command console
Now that you have figured out how to launch the SkookumIDE, you can immediately start using its Workbench as a powerful command console that allows you to query and manipulate just about anything you like. The SkookumScript UE4 Plugin is deeply integrated into the Unreal Engine. Right out of the box, thousands of classes, structs, methods and member variables are at your fingertips to make awesome things happen.
Using the SkookumIDE as a command console does not require your project to use SkookumScript for gameplay scripting. The command console will work with any UE4 project whether just starting a project, midway through or in the final phase!
Running script snippets will become an integral part of your workflow – and everyone on your team will love it.
See more on the Workbench widget page. The Tutorial Workbench includes a great set of script examples to learn and experiment.
Next step: Set up a project to use SkookumScript
After familiarizing yourself with SkookumScript by playing with the SkookumIDE Workbench console, you might decide that you’d like add some SkookumScript code to your project.
Follow the steps in Set up a UE4 project to use SkookumScript.
Adding SkookumScript methods to UE4 classes
An easy first step of creating gameplay with SkookumScript is simply adding methods (or coroutines) to UE4 classes.
UE4 classes are automatically reflected to SkookumScript, and appear in the SkookumIDE class tree under the same name as in UE4. You can either locate your UE4 class via the class filter widget, or, if you have it open in the UE4 Blueprint editor, by simply clicking the ![]() button.
button.
Once your class is selected in the SkookumIDE, add a method or coroutine like you would to any other SkookumScript class.
For example, you might add a method say_hey to the Actor class with the following body:
()
  [
  branch _draw_text("Hey there!")
  ]
You can then invoke this method on any actor, e.g. GameLib.player_pawn.say_hey.
SkookumScript-aware actors
As mentioned above, you can use SkookumScript to run code on any UE4 actor, for example from the Workbench console. However sometimes you also want to run special code whenever a particular type of actor gets spawned, or when it gets destroyed, or you want to store SkookumScript variables in an actor.
You accomplish this by adding a constructor ! and/or destructor !! and/or data members to the class via the IDE. If the class is a Blueprint class, the constructor and destructor will automatically get invoked when the object is created and destroyed, respectively, and data members are stored along with the UE4 entity (UObject).
Extending the UE4/Blueprint class hierarchy via SkookumScript
You can also extend the UE4/Blueprint class hierarchy with SkookumScript-only classes. E.g. in the case of an Enemy actor class, a class EnemyCaptain that is derived from Enemy and inherits most of the Enemy class’ functionality, but overrides a few methods that do things differently.
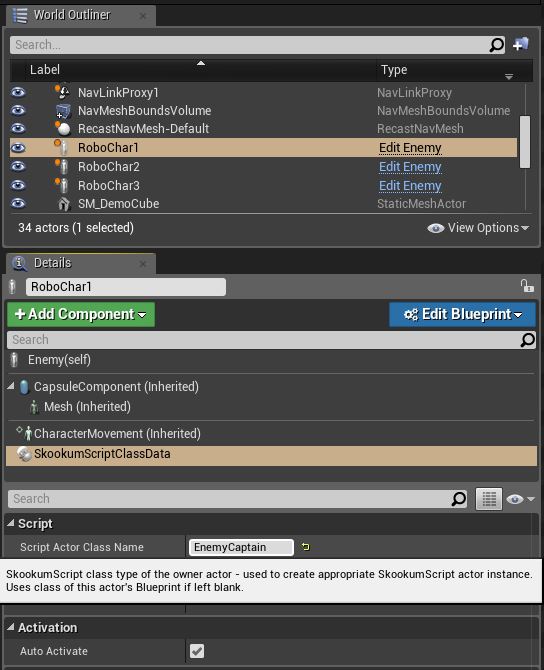
You implement this by first creating a class EnemyCaptain as a child of Enemy in the IDE. Then, in UE4Editor, attach a SkookumScriptClassDataComponent to the Enemy actor that you want to be the captain. Select the actor in the World Outliner of your level, and in the Details panel, choose Add Component. Select the SkookumScriptClassDataComponent. In the SkookumScriptClassDataComponent details, set the parameter Script Actor Class Name to EnemyCaptain. Now, this particular actor will be known to SkookumScript as an object of type EnemyCaptain while all other actors derived from the Enemy Blueprint will be of type Enemy.
 {}
{}
Mind actors
Minds are used to manage and update coroutines, and encapsulate logical components of gameplay such levels, missions, minigames, squad AI, and group behaviors. Mind objects also often act as the starting point for code.
Mind components are a convenient way to instantiate and destroy Minds in UE4. You can instantiate a SkookumScript Mind in a UE4 game by attaching it to an actor using a SkookumScriptMindComponent. Simply enter the name of your Mind-derived class into the Script Mind Class Name parameter of the SkookumScriptMindComponent, and an instance of your Mind class will be automatically created and attached whenever that UE4 actor is spawned, and detached and destroyed when the actor is destroyed.
A good example of Mind components in action is a Level Mind: Place an empty actor in your level and name it Level Mind. Add a SkookumScriptMindComponent and set the Script Mind Class Name to the name of your Mind class. Your Mind will now be instantiated when that level is loaded and destroyed when the level is unloaded.
More information can be found on the Mind object and the Master Mind page.
Call SkookumScript methods and coroutines from Blueprint event graphs
SkookumScript allows you to combine script methods and coroutines in many different ways with Blueprint event graphs, allowing you to get the best out of both systems.
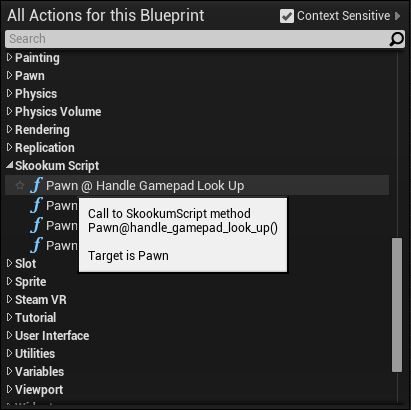
To expose a SkookumScript method or coroutine to the Blueprint event graph system, prefix its declaration with the annotation &blueprint like in the following example (handle_gamepad_look_up() method in the class Pawn):
&blueprint
(Real look_up_rate, Real base_look_up_rate)
  [
  add_controller_pitch_input(look_up_rate * base_look_up_rate * GameLib.world_delta_seconds)
  ]
Then, compile your project, which will make it available for placement in your event graph. Right click in your graph, and select the method you just exposed to Blueprints.
 {}
{}
Place it in your graph, and connect it just like you would any other node.
 {}
{}
Now, whenever its execution pin gets triggered, the SkookumScript method is invoked and its return value (if any) passed to the output pin.
Coroutines can be declared and placed in much the same way. There are two differences though:
- triggering the node’s execution pin will begin executing the coroutine, however it may finish many frames later
- coroutines do not have an output pin
Coroutine nodes always trigger the outgoing execution pin immediately, regardless of the time it takes for the coroutine to terminate. If you would like something to happen in the graph when the coroutine finishes, use event nodes as described in the next section.
Trigger Blueprint events with SkookumScript methods
You can also trigger execution of Blueprint event graph nodes from SkookumScript via a Blueprint event node exposed from SkookumScript.
To create a Blueprint event, create a method declaration prefixed with the &blueprint annotation, but without a body.
&blueprint
(Boolean some_parameter)
Again, recompile its SkookumScript class (or, the entire project) which will make it available for placement in your event graph. Right click in your graph, select Add Event, then, in the Skookum Script category, select the method you just exposed to Blueprints. Place it in your graph, and connect its output pins just like you would any other Blueprint event.
Now, whenever your SkookumScript method is called from a script, its arguments are passed to the event node’s output pins, and the event node’s execution output pin is triggered!
Invoke Blueprint functions, Blueprint custom events and Blueprint event dispatchers from SkookumScript
Just like UE4 classes, Blueprint functions, custom events and event dispatchers are automatically reflected to SkookumScript, and appear in the SkookumIDE member list of the UE4 class they belong to. For example, if you have a Blueprint function named MyFunction in your UE4 Blueprint class, it will be available in SkookumScript as a method my_function. If you have an Event Dispatcher named MyEventDispatcher in your UE4 Blueprint class, it will be available in SkookumScript as @my_event_dispatcher of type MulticastDelegate with the same parameter signature as your original Blueprint event dispatcher.
You invoke a blueprint function or custom event like you would invoke any SkookumScript method, e.g. my_actor.my_function(arg1 arg2).
You invoke a dispatcher just like you would invoke a closure, e.g. my_actor.@my_event_dispatcher(arg1 arg2).
Use UE4 delegate events to control SkookumScript program flow
UE4 allows game objects to “listen” to events happening in the world via MulticastDelegate objects. MulticastDelegate properties declared in C++ are automatically reflected to SkookumScript as a coroutine that comes in three flavors:
_wait_my_event(): Waits formy_eventto occur, then returns. Optionally passes event parameters back via SkookumScript return arguments._on_my_event_do((event_parameters) code): Loop that invokes the closurecodewhenevermy_eventoccurs. Loops forever and never returns. You can terminate it though by aborting its coroutine._on_my_event_do_until((event_parameters) Boolean code): Loop that invokes the closurecodewhenevermy_eventoccurs. Loops until the closure returnstrue. Optionally passes event parameters back via SkookumScript return arguments.
The following code waits for an ActorBeginOverlap event on the TriggerBerzerk volume, then proceeds with execution:
Volume.named("TriggerBerzerk")._wait_actor_begin_overlapThis code repeatedly executes code whenever a TakeAnyDamage event occurs:
player_pawn._on_take_any_damage_do[player_pawn.draw_text("Ouch")]Here is an example of processing ActorBeginOverlap events until we find one that we like, then proceed with execution:
Volume.named("TriggerBerzerk")._on_actor_begin_overlap_do_until[other_actor.class_of?(Hero)]The SkookumScriptBehaviorComponent
There is a component specifically designed to create behavior objects to attach temporarily to an actor. The idea is to attach it to an actor and the actor starts doing something controlled by the component. Then detaching the component stops the behavior. You create your own behavior component by subclassing from SkookumScriptBehaviorComponent either in the SkookumIDE, or creating a Blueprint class derived from it in the UE4Editor. You can also subclass from USkookumScriptBehaviorComponent in C++ to create your own custom script-enabled C++ component. This component can be attached to an actor in UE4Editor but is also visible from scripts as a ![]() class, and can be attached and detached via script. If you like, you can attach and detach your component several times with the object living on inbetween, potentially doing things even while detached. Attach as many components to an actor as you like. Mix between Blueprint-created and script-attached
class, and can be attached and detached via script. If you like, you can attach and detach your component several times with the object living on inbetween, potentially doing things even while detached. Attach as many components to an actor as you like. Mix between Blueprint-created and script-attached SkookumScriptBehaviorComponents. You can give your custom SkookumScriptBehaviorComponent any constructor you like that can take any number of arguments.
The SkookumScriptBehaviorComponent has the following methods to override with your own:
!(constructor): IMPORTANT You need to call this constructor from the constructor in your derived class viaSkookumScriptBehaviorComponent@!()- it does important low-level initialization.on_attach(): Callback that is invoked just after the component has been attached to an actor. Override with your own implementation in your custom component.on_detach(): Callback invoked just before this component is detached from its actor.on_begin_play(): Callback invoked when the component is beginning play, called before its owner’s BeginPlay on Actor BeginPlay or when the component is dynamically created if the Actor has already BegunPlay.on_end_play(): Callback invoked when gameplay for the component ends.
There are also the two methods attach and detach that you can invoke to attach/detach your component to/from an actor.
A typical way to create and attach a component would be MyComponent!(my_argument1 my_argument2).attach(some_actor). Find a SkookumScriptBehaviorComponent on an actor via !my_component: some_actor.component_by_class(SkookumScriptBehaviorComponent.static_class)<>SkookumScriptBehaviorComponent. Detach it via my_component.detach. Or keep a reference to it around.
Under the hood
If you read this far, you might be interested in some of the more technical details!
SkookumScriptGenerator and the Engine-Generated and Project-Generated-C++ overlays
The SkookumScript plugin comes with a module named SkookumScriptGenerator which plugs into UE4’s UnrealHeaderTool. Whenever any C++ code is compiled, either for the engine or for your game project, SkookumScriptGenerator automagically generates SkookumScript script files for it, using the same reflection macros (UCLASS, USCTRUCT, UPROPERTY etc) that the Blueprint system uses. These generated SkookumScript script files are placed in the Engine-Generated and Project-Generated-C++ overlays of your project. For efficient processing and storage, this script code is stored in a single archive file per overlay.
The Project-Generated-BP overlay
The SkookumScript plugin also reflects dynamic UE4 types as well as most of their properties and functions to SkookumScript. Whenever a new UE4 Blueprint class, user defined struct or user defined enum is loaded into memory, the plugin generates Skookumscript script files for it, with declarations of its properties, Blueprint functions, custom events and event dispatchers.
The storage format is one archive file per class, struct or enum. The plugin will automatically check out, add or delete these files from source control, so you can keep them revisioned along with your project assets and script files.
The SkookumScript.ini file
The SkookumScript plugin keeps a number of settings that control the generation of script files in a file named SkookumScript.ini. There is one such file in each the plugin’s Config folder (belonging to the Engine-Generated overlay) and your project’s Config folder (belonging to the Project-Generated-C++ and Project-Generated-BP overlays).
In SkookumScript.ini, you can specify the following parameters
+ScriptSupportedModulesto tell SkookumScript for which module to generate bindings (this is usually just one module - your main game module)+AdditionalIncludesto specify additional include files to include to make the binding code work (this is sometimes necessary as UE4 header files very often do not include all necessary sub-includes and will simply not compile unless used in a “magic order” which is hard to get perfect)+SkipClassesto specify the names of classes or structs that you do not want to reflect to SkookumScript+RenameClassesand+RenamePropertiesto resolve name conflicts when mapping UE4 Blueprints to SkookumScript code (see here for details)
Next » Set up a UE4 project to use SkookumScript
« Previous SkookumScript Primer